 Claiming Expenses for a Business Trip
Scan receipts and save them as PDF files. The amount on the receipt is extracted automatically so that you can easily copy the amount when claiming it as an expense.
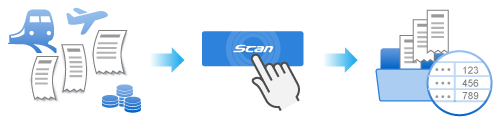
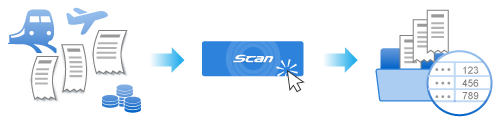
This section explains how to scan the receipts that you received during a business trip and to recognize the amount (text) on the receipts as content information in order to claim the expenses for a business trip.
Receipts can be scanned with the ScanSnap by inserting two receipts at a time or by inserting the next document while the current document is being scanned. These scanning methods are referred to as dual scans. The procedure below shows an example of inserting two receipts in the ScanSnap at the same time. For details about dual scans, refer to Scanning Documents by Inserting Two Documents at a Time or by Inserting the Next Document While the Current Document Is Being Scanned.
When you scan small size documents that are folded or curled such as receipts, it is recommended that the documents be scanned one by one.
Specifying [Manual scan] for [Feed mode setting] on the touch panel of the ScanSnap prevents paper jams so that documents can be scanned without any damage. For details, refer to Scanning Documents That Are Folded or Curled such as Receipts One by One.
-
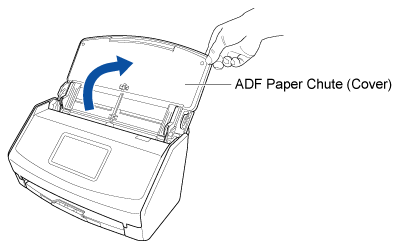
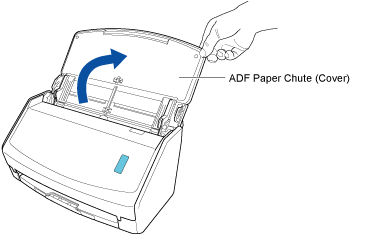
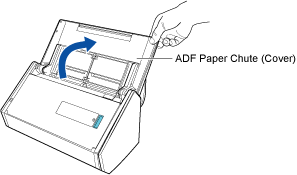
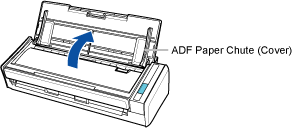
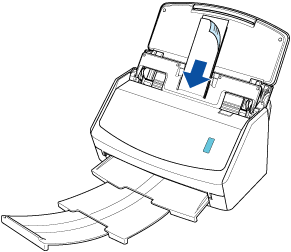
Open the ADF paper chute (cover) of the ScanSnap to turn the power on. Hold the right side of the ADF paper chute (cover) of the ScanSnap then open it or press the [Scan] button to turn it on. Open the feed guide of the ScanSnap to turn the power on.
-
Hold the right side of the ADF paper chute (cover) on the ScanSnap, and then open it to turn it on.
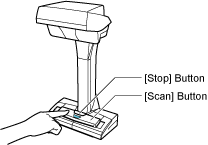
Open the ADF paper chute (cover) fully so that the [Scan] button lights up in blue.
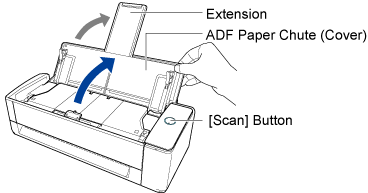
When the ADF paper chute (cover) is opened, the extension will rise automatically.
- Open the ADF paper chute (cover) of the ScanSnap to turn the power on. Hold the right side of the ADF paper chute (cover) of the ScanSnap then open it or press the [Scan] button to turn it on. Open the feed guide of the ScanSnap to turn the power on.
- Press the [Scan] button or [Stop] button on the ScanSnap to turn the power on.
- Prepare a profile in ScanSnap Home.
-
Click the [Scan] button at the top of the Main Window of ScanSnap Home to display the Scan Window.
If the main window is not already displayed, refer to To Display the Main Window.
If the main window is not already displayed, click the [ScanSnap Home] icon
 in the application list that appears when you click Launchpad in the Dock.
 -
Click
 to display the [Add new profile] Window.
HINTThe currency on receipts is automatically obtained from the locale (information of country and region) of your computer.
To change the currency and relevant items for a receipt, refer to Specifying a Text Recognition Language for Each Document Type.
-
Click the [Scan] button at the top of the Main Window of ScanSnap Home to display the Scan Window.
- Scan documents with the ScanSnap.
This section explains the procedure to perform a scan with the Receipt Guide which is useful for loading multiple receipts in the ScanSnap at the same time.
Load multiple receipts with different widths and lengths in the ScanSnap and scan them at the same time.
In this step, insert two receipts in the ScanSnap and scan them at the same time.
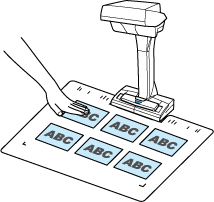
In this step, place multiple receipts on the ScanSnap and scan them at the same time.
-
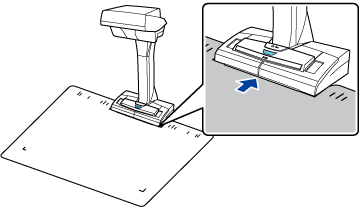
Place the Background Pad on the front side of the ScanSnap.
Place the Background Pad so that it is in contact with the ScanSnap.
-
Place documents in the scan area of the ScanSnap.
-
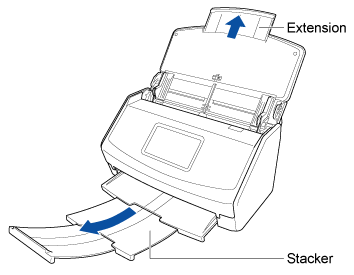
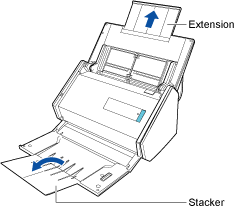
Pull out the extension and the stacker on the ADF paper chute (cover).
-
Pull the stacker towards you.

-
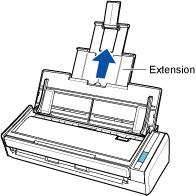
Pull out the extension.
- Load receipts in the ADF paper chute (cover).
Load the receipts according to the width of the guides on the Receipt Guide.
Load the receipts face-down and top-first with its back facing you.
-
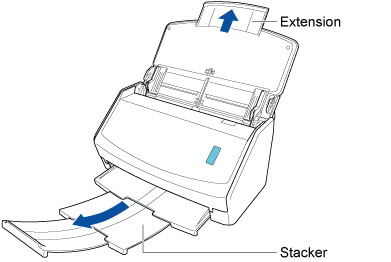
Pull out the extension on the ADF paper chute (cover) and open the stacker.
-
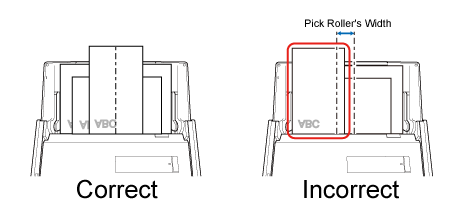
Align the leading edge with the center of the documents.

-
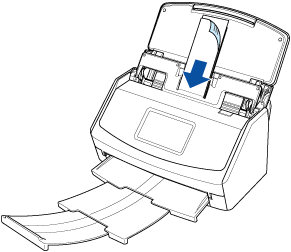
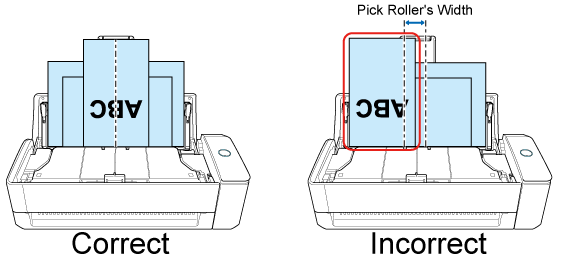
Load the documents in the center of ADF paper chute (cover).
Load all documents over one another above the pick roller (center). Documents that are not loaded above the pick roller cannot be fed.
Load all documents over one another above the pick roller (center). Documents that are not loaded above the pick roller cannot be fed.
 ATTENTION
Also, adjust the side guides to the widest document in the batch. Load the other documents so that they can be scanned straight. If the documents are skewed during scanning, the following problems may occur:
Part of the scanned image appears missing
Slant lines appear in the scanned image
The size of the scanned image differs from the document size
-
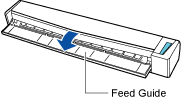
Insert documents straight into the feeding section of the ScanSnap, with the scanning side facing up.
Insert each document in the center of the left half and in the center of the right half of the feeding section at least 10 mm (0.39 in.) apart from each other. Make sure that the document is fed into the ScanSnap and is held firmly.
 HINT
HINT-
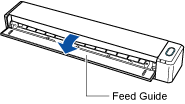
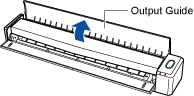
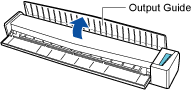
If you want the documents to be ejected from the front of the ScanSnap or when there is not enough space where the documents exit the ScanSnap, open the output guide.
-
How the documents are ejected differs as below depending on whether the output guide is open or closed.
-
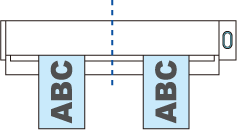
When the output guide is closed


-
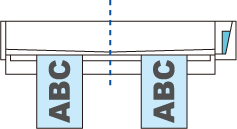
When the output guide is open


-
-
-
Place the Background Pad on the front side of the ScanSnap.
The amount on the receipt that you scanned with ScanSnap Home is recognized as text. Therefore, it can be copied and pasted onto other applications.
The content information that includes the amount on the receipt can be output in a CSV format. Therefore, it can be used with other applications.
From [Receipt information] in the contents data record of the scanned receipt, the amount on the receipt is output as a receipt data in a CSV format.