Abnormal Noise Is Generated from the ScanSnap.
- Cause
The issue may be caused by the following:
The Roller Set is dirty.
The Roller Set is not installed correctly.
There is foreign matter inside the ScanSnap.
- Solution
-
When the Roller Set is dirty
Clean the Roller Set.
For details, refer to Cleaning the Inside of the ScanSnap in ScanSnap Cloud Operation.
When the Roller Set is not installed correctly
Remove the Roller Set, and then install it again in the following procedure:
Unplug the power cable.
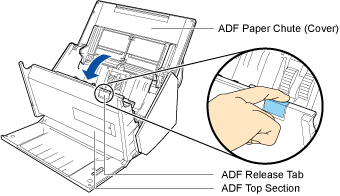
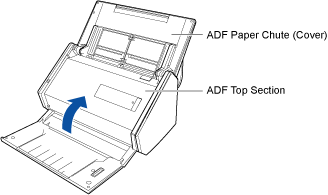
Remove the documents from the ADF paper chute (cover).
Pull the ADF release tab to open the ADF top section.
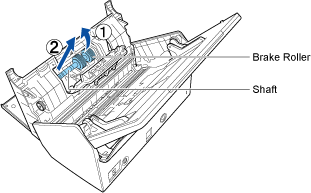
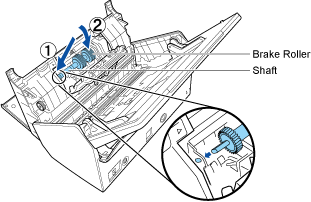
Remove the brake roller, and then install it again.
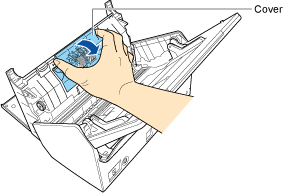
Open the cover.
Hold both ends of the cover, and open it in the direction of the arrow.
Remove the brake roller shaft.
Lift the right side of the roller first, then pull out the shaft from the slot on the left.
Remove the brake roller from its shaft.
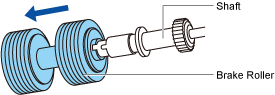
Attach the removed brake roller to the shaft again.
Insert the protrusion on the shaft into the slot.
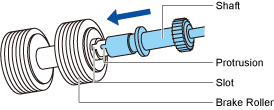
Install the brake roller with its shaft.
Fit the left end of the shaft in the slot, then install the rest of the shaft in place.
Close the cover.
ATTENTIONConfirm that the brake roller is installed properly. Otherwise, it may cause feeding errors such as paper jams.
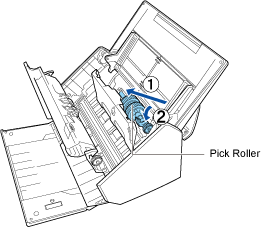
Remove the pick roller, and then install it again.
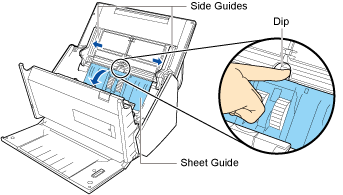
Open the sheet guide.
Slide the side guides all the way, and pull the sheet guide open from the dip.
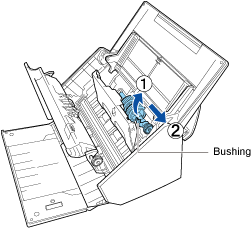
Rotate the bushing to lock the shaft in the direction of the arrow.
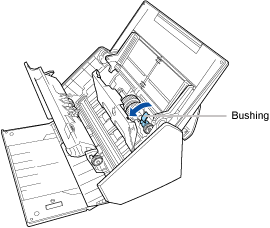
Remove the pick roller.
Gently lift the right side of the shaft (about 5 mm), move it towards the right, and then pull it out.
 ATTENTION
Be careful not to touch the gear near the bushing on the shaft as it contains grease.
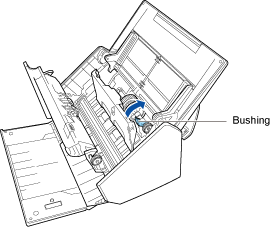
Install the removed pick roller again.
Insert the left end of the shaft into the slot, and lower the other end gradually.
Rotate the bushing to lock the shaft in the direction of the arrow.
 ATTENTION
Confirm that the pick roller is installed properly. Otherwise, it may cause feeding errors such as paper jams.
Close the sheet guide.
Make sure that both ends of the sheet guide are locked firmly.
Close the ADF top section until it clicks.
Connect the power cable, and open the ADF paper chute (cover) to turn on the ScanSnap.
When there is foreign matter inside the ScanSnap
Perform the following:
Remove the document from the ADF paper chute (cover)/feed guide.
Pull the ADF release tab to open the ADF top section.
Clear any foreign matter from the inside of the ScanSnap.
Close the ADF top section.