Setting up with a Mobile Device
When the setup process is complete, the camera function becomes available.
- Download and install the ScanSnap Cloud application.
-
Start the ScanSnap Cloud application.
When you already have a ScanSnap account
Tap the [I already have an account] button, log in with your ScanSnap account, and go to step 4.
When you do not have a ScanSnap account
Tap the [For initial use] button and go to step 3.
-
Create a ScanSnap account.
 HINT
HINTSpecify a valid e-mail address for your ScanSnap account.
The following characters can be used for a password:
Alphanumeric characters
A to Z, a to z, and 0 to 9
Symbols
! @ # $ % ^ * ( ) - \ _ + | [ ] { } : , . / ?
A password must be 8 characters or longer.
-
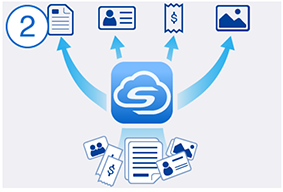
Specify a cloud storage service for a scanned image.
 HINT
HINTIf you select [Save by document type], you need to specify cloud storage services for all of the document types.
-
Register the ScanSnap.
When using ScanSnap iX1600
Refer to Setting up with a Mobile Device (step 7 onward) in ScanSnap Cloud Setup (iX1600) to register the ScanSnap.
When using ScanSnap iX1500
Refer to Setting up with a Mobile Device (step 7 onward) in ScanSnap Cloud Setup (iX1500) to register the ScanSnap.
When using ScanSnap iX1300
Refer to Setting up with a Mobile Device (step 5 onward) in ScanSnap Cloud Setup (iX1300) to register the ScanSnap.
When using ScanSnap iX500
Refer to Setting up with ScanSnap iX500 and a Mobile Device (step 5 onward) in ScanSnap Cloud Setup (iX500) to register the ScanSnap.
When using ScanSnap iX100
Refer to Setting up with ScanSnap iX100 and a Mobile Device (step 5 onward) in ScanSnap Cloud Setup (iX100) to register the ScanSnap.
The setup process for the ScanSnap Cloud service is complete.
HINTRefer to Changing the Settings that Were Configured at the Setup for details about how to change a cloud storage service for scanned images, change a wireless access point, or add the ScanSnap to be used after setting up the ScanSnap Cloud service.