Scanning Long Pages (S1300i)
Documents up to 863 mm (34 in.) in length can be scanned.
For details about documents that can be scanned, refer to Documents to Scan (S1300i).
For details about how to load documents that are 360 mm (14.17 in.) or less in length, refer to Scanning Documents (S1300i).
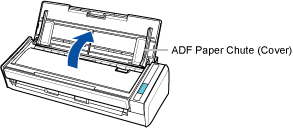
- Open the ADF paper chute (cover) of the ScanSnap.
- The [Scan] button flashes in blue. The button returns to being lit normally when document scanning is enabled.
In addition, the ScanSnap Manager icon in the notification area located at the far right of the taskbar changes from
 to
to  .
.
- The [Scan] button flashes in blue. The button returns to being lit normally when document scanning is enabled.
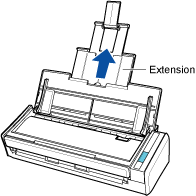
- Pull out the extension.
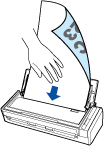
- Load only one document in the ADF paper chute (cover).
Hold the document with your hand so that it does not fall out of the ADF paper chute (cover).
- Press the [Scan] button on the ScanSnap (for three seconds or longer) until the button flashes in blue to start a scan.ATTENTION
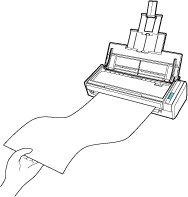
- Secure enough space where the scanned documents are ejected from the ScanSnap, and pick up the documents with your hands to prevent them from falling off the unit where the ScanSnap is placed on.
- Do not perform the following operations during scanning. Doing so will stop scanning.
- Connect or disconnect the ScanSnap and other USB devices.
- Close the ADF paper chute (cover).
- Switch users.
- Allow the computer to enter sleep mode.
HINTWhen you scan the first page as a long page and continue scanning, the subsequent documents are also scanned as long pages.
- The [Scan] button on the ScanSnap flashes in blue while the documents are being scanned.
The [ScanSnap Manager - Image scanning and file saving] window appears.
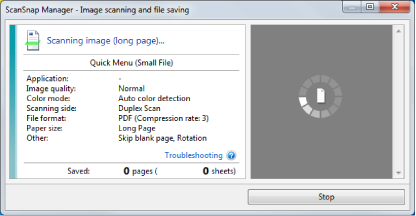
- The Quick Menu appears when the scanning is completed.
- Secure enough space where the scanned documents are ejected from the ScanSnap, and pick up the documents with your hands to prevent them from falling off the unit where the ScanSnap is placed on.
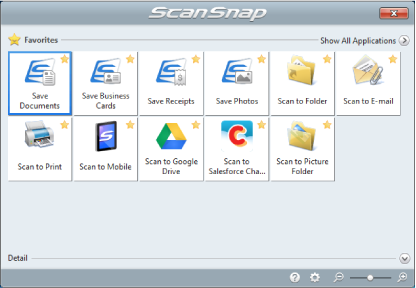
- In the Quick Menu, click the icon of the application to link with ScanSnap Manager.
When you select [Save Documents], you can manage scanned images by folder with ScanSnap Home.
For details, refer to Managing Paper Documents by Folder on a Computer with ScanSnap Home.
HINT[ScanSnap Organizer] is displayed in the Quick Menu when ScanSnap Organizer is installed.
To manage scanned images by folder with ScanSnap Organizer, refer to Managing Paper Documents by Folder on a Computer with ScanSnap Organizer.
- The selected application starts up. For details, refer to the Advanced Operation Guide.
ATTENTION- You cannot start scanning when the Quick Menu is displayed. Either select an icon from the Quick Menu and finish the process, or close the Quick Menu before you perform the next scan.
- Do not move, delete, or rename scanned images using other applications while the Quick Menu is displayed.
HINT- Clicking
 displays the description of an application. Placing the mouse cursor over the icon of another application displays the description of the application.
 - Performing a scan while an application that can be automatically linked with is active automatically starts the linkage between ScanSnap Manager and the application.
For details, refer to the Advanced Operation Guide.