Managing Scanned Images in SharePoint
This section explains how to save the scanned image in SharePoint.
ATTENTION
- To save a large file to SharePoint, the SharePoint setting needs to be changed. For details about changing the SharePoint setting, contact the system administrator.
- Once you register the SharePoint site, ScanSnap Manager automatically connects to that site from the next startup of Scan to Microsoft SharePoint. For more details, refer to the Scan to Microsoft SharePoint User's Guide.
- Click the [Scan to SharePoint] icon
 in the Quick Menu.
- Scan to Microsoft SharePoint starts up.
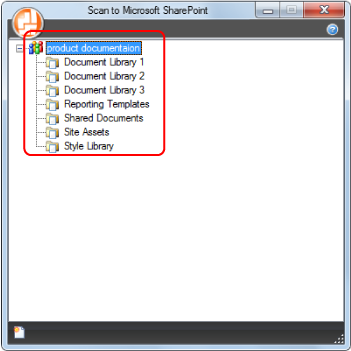
- From the sites list, select a document library in which you want to save the scanned image.
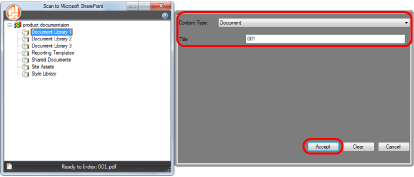
- The Index Pane appears.
- Enter information, such as the title, and click the [Accept] button.
- The scanned image is saved in the specified document library.
ATTENTION
- You cannot start scanning when the Quick Menu is displayed. Wait until ScanSnap Manager links with Microsoft SharePoint before scanning another document.
- Do not move, delete, or rename scanned images using other applications while the Quick Menu is displayed.
HINT
- For details about Scan to Microsoft SharePoint, refer to the Scan to Microsoft SharePoint User's Guide.
- You can change the settings for [Scan to SharePoint]. For details, refer to Changing the Settings of Linked Applications.
- Profiles can also be used for the linkage function. For details, refer to Profile.