Using ScanSnap as a Copy Machine to Print Scanned Images with a Printer
This section explains how to print the scanned image with a printer.
When a printer links with ScanSnap Manager, the ScanSnap can be used as a copy machine.
Note that shadows around the edges of the document may appear as lines on the generated scanned image, depending on the scanning method and paper conditions. If you print such an image, the printed image will also have lines appearing in it.
- Click the [Scan to Print] icon
 in the Quick Menu.
- The [Print] window appears.
HINTYou can configure the settings to not show the [Print] window. If you configure the settings to not show the [Print] window, printing is performed directly.
For details about changing the settings, refer to Changing the Settings of Linked Applications.
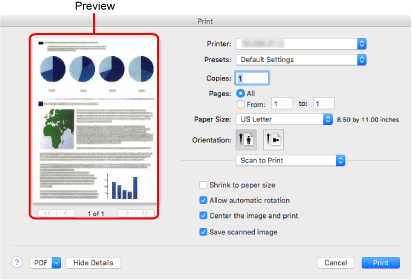
- Check the scanned image in the [Print] window.
In the [Print] window, you can specify the printer to be used, the number of copies and size and position of the scanned image to be printed, and whether to save the scanned image in the folder specified for [Image saving folder].
For details about the [Print] window, refer to the ScanSnap Manager Help.
- Click the [Print] button.
- The scanned image is printed.
- You cannot start scanning after the Quick Menu is displayed and before the [Scan to Print] window is closed. Close the [Scan to Print] window before scanning the next document.
- Do not move, delete, or rename the scanned image in other applications after the Quick Menu is displayed and before the [Scan to Print] window is closed.
- The settings for [Scan to Print] can be changed. For details, refer to Changing the Settings of Linked Applications.
- Profiles can also be used for the linkage function. For details, refer to Profile.