Setting Up the ScanSnap for the First Time
Set up the ScanSnap that you purchased for the first time so that it is ready to scan with ScanSnap Home.
The following preparations are required before you set up the ScanSnap.
Do not connect the ScanSnap to the computer before installing the software.
-
Check that all items are included in the package
For details, refer to Package List.
For details, refer to "Package List" in Getting Started that is supplied with the scanner.
HINTWhen Getting Started is included in the package, refer to "Package List" in Getting Started.
-
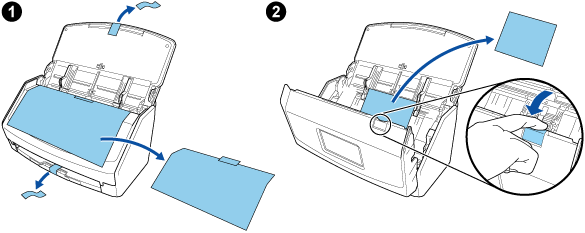
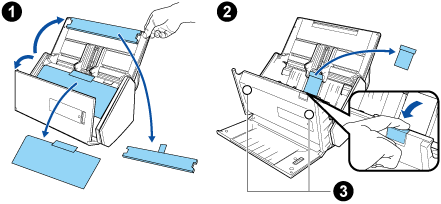
Remove the protective inner cover and tape (
 ) and the cardboard sheet (
 ) from the ScanSnap
For ScanSnap iX1600
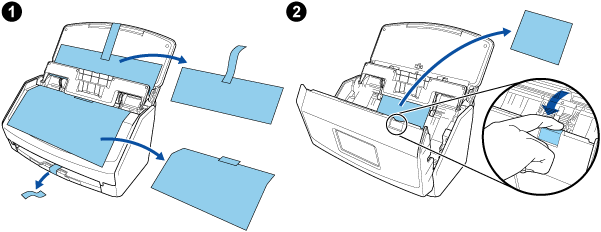
For ScanSnap iX1600 Receipt Edition
-
Remove the protective inner cover and tape (
 ) and the cardboard sheet (
 ) from the ScanSnap
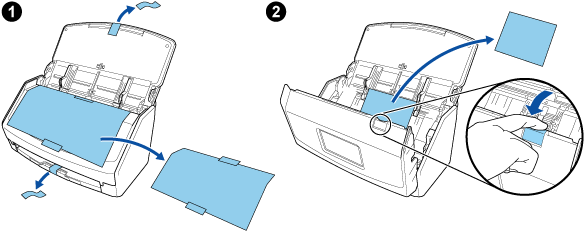
-
Remove the protective inner cover and tape (
 ) and the cardboard sheet (
 ) from the ScanSnap
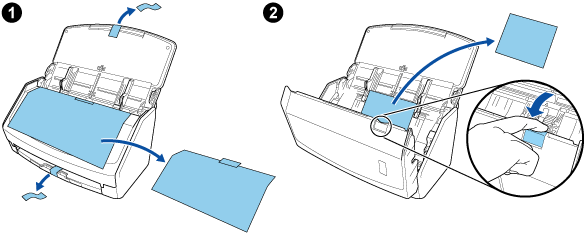
-
Remove the materials used for protection from the ScanSnap
For details, refer to Getting Started that is supplied with the scanner.
-
Remove the protective inner cover and tape (
 ) and the cardboard sheet (
 ) from the ScanSnap
The data on the card may be lost if the black magnetic part of a magnetic card or IC card is in contact with the magnetic part (
 ).
).
-
Remove the tape seal (
 ) and tape (
 ) from the ScanSnap
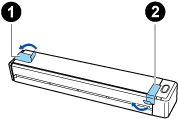
-
Remove the tape (
 ) and tape seal (
 ) from the ScanSnap
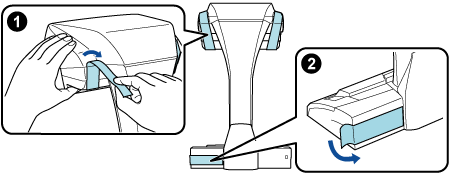
-
Remove the tape seal (
 ) from the ScanSnap
-
Remove the tape seal (
 ) and tape (
 ) from the ScanSnap
-
Connect the ScanSnap and the computer with a USB cable, and charge the battery until the battery indicator light turns off
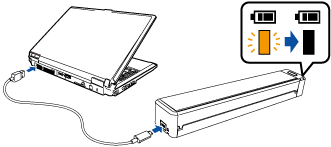 ATTENTION
Do not open the feed guide until the instructions are displayed on the window for installing software.
The ScanSnap can be charged with the supplied USB cable or optional USB power adapter. For purchasing details of the USB power adapter, refer to "Suppliers of Consumables/Optional Parts" in Customer Support.
-
Attach the extenders to the ScanSnap
ATTENTION-
The following preparations are required before you attach the extenders.
Wipe off dust and dirt such as oily dirt on the place where the extenders will be attached
Peel the protective tape off the bottom of the extenders
Leaving about 3 to 5 mm of space between the extenders and the back and side of the ScanSnap, push the extenders down until they lock in place. If the extenders are placed against the side of the ScanSnap base or the protrusion of the extenders are placed on the ScanSnap base, the bottom of the extenders may not stay in place firmly.

-
The procedure to set up the ScanSnap is as follows:
 Configuring the settings of the ScanSnap
-
-
Connect the power cable to the power connector on the ScanSnap and the AC outlet.
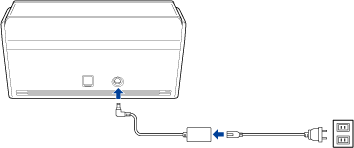
Use only the AC adapter and cables that are bundled with the ScanSnap. Using other adapters and cables may cause a scanner failure.
-
Open the ADF paper chute (cover) to turn the power on.
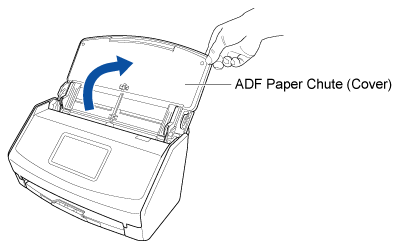
Configure the settings of the ScanSnap by following the instructions on the touch panel.
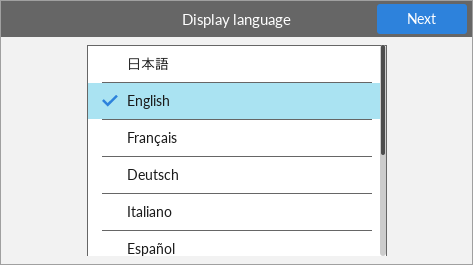

Set the display language for the touch panel, the startup mode, and a device that is used with the ScanSnap.
To set up the scanner by using a mobile device, follow the instructions displayed on the touch panel to connect the ScanSnap to a wireless access point.
When the [USB Connection] window is displayed on the touch panel, the setting procedure for the ScanSnap is complete.
If you set up the scanner by using a mobile device, when [Launch the software on the device and connect it to the ScanSnap.] is displayed on the touch panel, the setting procedure for the ScanSnap is complete.
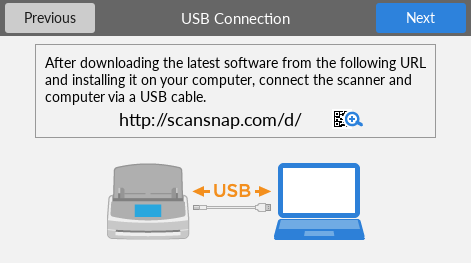

-

 Downloading the Software
-
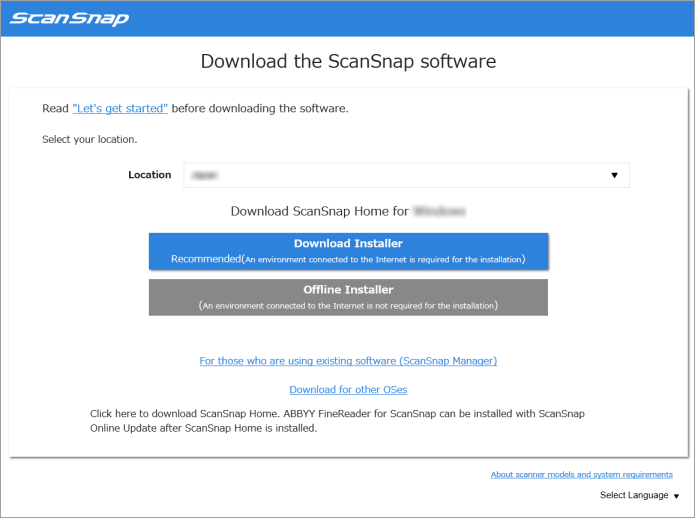
On your computer or mobile device, download the software from here.
On your computer, download the software from here.
To set up the ScanSnap by using a mobile device, refer to Using the ScanSnap with a Mobile Device.
When your computer is connected to the Internet
Click [Download Installer] to download the software.
When your computer is not connected to the Internet
On another computer that is connected to the Internet, click [Offline Installer] to download the software in advance.
Copy the downloaded software to your computer.
To set up the ScanSnap by using a mobile device, refer to Using the ScanSnap with a Mobile Device.

 Installing the Software/Connecting the ScanSnap
-
Run the installer that you saved on your computer.
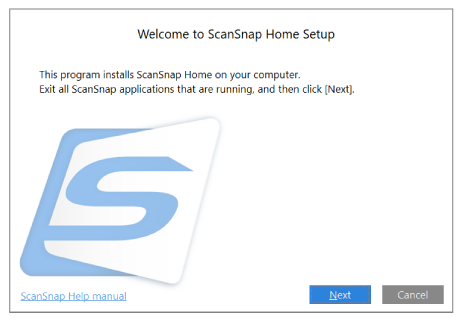
When the [ScanSnap Home Setup] window (Welcome to ScanSnap Home Setup) appears, click the [Next] button to start installing the software.
Follow the instructions to install the software.
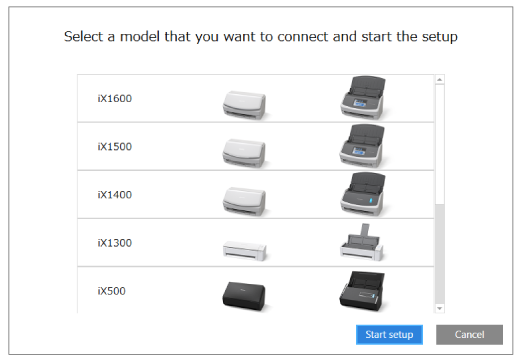
The window for selecting a model to be connected appears after the installation is complete, select a ScanSnap model that you want to connect and then click the [Start setup] button.
-
When the [ScanSnap Home - Connecting ScanSnap] window (Connect the ScanSnap to your computer) is displayed, follow the instructions on the window to connect the ScanSnap to a computer via a USB cable and click the [Next] button.
Do not use a cable other than the supplied one to connect to the ScanSnap. Using other cables may cause a scanner failure.
HINTIf you cannot connect a USB cable to a computer, click [Setup without the USB cable] displayed in the lower left of the [ScanSnap Home - Connecting ScanSnap] window (Connect the ScanSnap to your computer), and follow the instructions on the window to connect the ScanSnap to the computer via Wi-Fi.
The default scanner name of the ScanSnap is "ModelName-<Serial No.>".
To connect the ScanSnap and a computer via Wi-Fi, you need to connect the computer and the ScanSnap to the same wireless access point.
HINTIf you cannot connect a USB cable to a computer, click [Setup without the USB cable] displayed in the lower left of the [ScanSnap Home - Connecting ScanSnap] window (Connect the ScanSnap to your computer), and follow the instructions on the window to connect the ScanSnap to the computer via Wi-Fi.
When the [ScanSnap Home - Connecting ScanSnap] window (How to connect ScanSnap) is displayed, follow the instructions on the window to connect the ScanSnap to a computer via a USB cable and click the [Next] button.
Do not use a cable other than the supplied one to connect to the ScanSnap. Using other cables may cause a scanner failure.
-
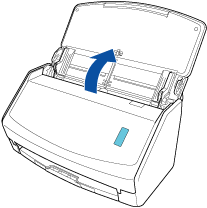
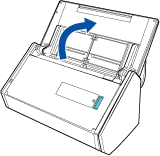
Follow the instructions on the window and open the ADF paper chute (cover) of the ScanSnap to turn the power on, then click the [Next] button.

-
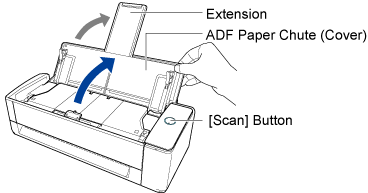
Follow the instructions on the window and hold the right side of the ADF paper chute (cover) of the ScanSnap, and open it to turn the power on, then click the [Next] button.
Open the ADF paper chute (cover) fully so that the [Scan] button lights up in blue.
When the ADF paper chute (cover) is opened, the extension will rise automatically.
-
Follow the instructions on the window and open the ADF paper chute (cover) of the ScanSnap to turn the power on, then click the [Next] button.


-
Follow the instructions on the window and press the [Scan] button or [Stop] button on the ScanSnap to turn the power on, and then click the [Next] button.
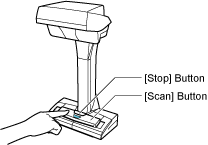
When the [ScanSnap Home - Connecting ScanSnap] window (Select a startup mode.) appears, select a startup mode and click the [Next] button.
When the "Connection is complete" window appears, click the [Next] button.
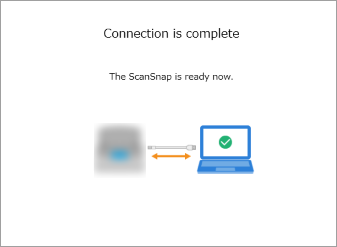
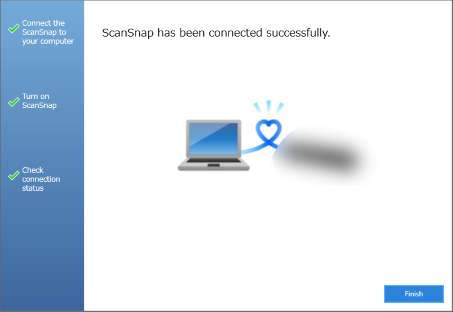
When the "ScanSnap has been connected successfully." window appears, click the [Finish] button.
The window for checking whether to configure the Wi-Fi settings for the ScanSnap is displayed.
- Wi-Fi connection
-
ATTENTION
-
To connect the ScanSnap and a computer via Wi-Fi, the computer must be already connected to the wireless access point that you want to connect the ScanSnap to.
Click the [Yes] button.
When the wireless network setup wizard appears, follow the instructions on the window to connect the ScanSnap to a wireless access point.
-
- USB cable connection
Click the [No] button.
The Wi-Fi settings for the ScanSnap can be configured later.
For details, refer to Connecting the ScanSnap and the Computer Via a Specified Wireless Access Point.
For details, refer to Configuring the Wi-Fi Settings.
When the [ScanSnap wireless network setup] window appears, select whether to configure the Wi-Fi settings for the ScanSnap.
- Wi-Fi connection
-
ATTENTION
-
To connect the ScanSnap and a computer via Wi-Fi, the computer must be already connected to the wireless access point that you want to connect the ScanSnap to.
Click the [Setup now] button.
When the wireless network setup wizard appears, follow the instructions on the window to connect the ScanSnap to a wireless access point.
-
- USB cable connection
Click the [Later] button.
The Wi-Fi settings for the ScanSnap can be configured later.
For details, refer to Configuring the Wi-Fi Settings.
When the video tutorial is displayed, view the video explaining the basic use of ScanSnap Home, if necessary.
HINTThe video tutorial can be viewed later at anytime.
To view the video tutorial, select [Help] → [View the video explaining the method of use] in the menu.
The video tutorial can be viewed later at anytime.
To view the video tutorial, select [Help] → [View the video explaining the method of use] on the menu bar.
When the [ScanSnap Home - Connecting ScanSnap] window (Let's use it!) appears, check the contents and click the [Close] button.
When the tutorial which explains the basic use of ScanSnap Home appears, click the [Start] button to begin the tutorial, if necessary.
HINTThe tutorial can be viewed later at anytime.
To view the tutorial, select [Help] → [Tutorial] in the menu.
The tutorial can be viewed later at anytime.
To view the tutorial, select [Help] → [Tutorial] on the menu bar.
When the ScanSnap is connected correctly, the scanner name of the connected ScanSnap is displayed in [Select a scanner] in the Scan Window.
The scan window appears when you click the [Scan] button at the top of the Main Window of ScanSnap Home.
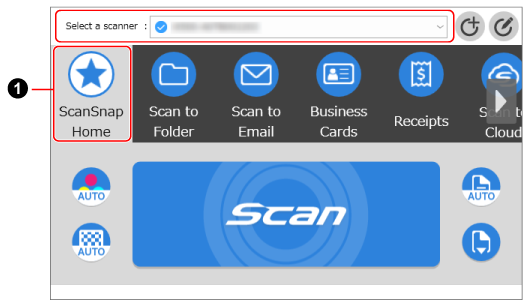
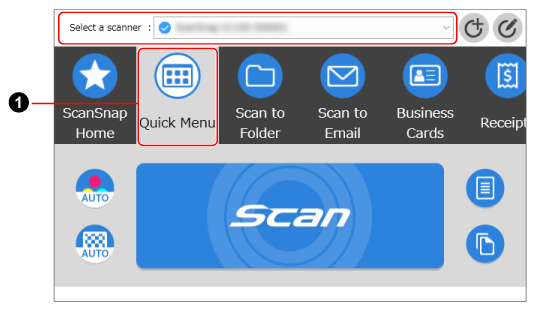
The window varies depending on the ScanSnap to be connected.
ScanSnap Home allows you to register your favorite scan settings for the ScanSnap as a profile (
 ).
).Multiple user-friendly profiles are available by default. For details, refer to What is a Profile?.
Profiles are displayed both on the touch panel of the ScanSnap and in the scan window of ScanSnap Home.
On the touch panel of the ScanSnap or in the scan window of ScanSnap Home, select a profile, and press the [Scan] button to perform a scan.
In the scan window, select a profile, and click the [Scan] button to perform a scan.
HINTCreating new profiles and modifying profiles are possible.
For details, refer to Creating a New Profile or Modifying the Settings for a Profile.
You can change the profile to the one you want to use in the menu which appears when you click the ScanSnap Home icon.
For details, refer to Icon (Indicator for ScanSnap Connection Status) and Menus.
To use the ScanSnap with a mobile device, refer to Using the ScanSnap with a Mobile Device.
For details about how to connect the ScanSnap and a computer directly, refer to Connecting the ScanSnap and a Computer Directly by a Direct Connection.
For details about how to connect the ScanSnap and a computer directly, refer to the ScanSnap Wireless Setup Tool Help.