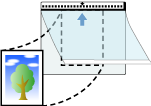
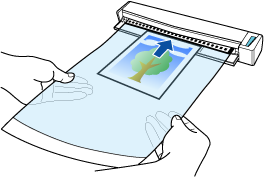
Scan documents that can be damaged quite easily such as photographs, or non-standard size documents such as clippings. Manually feed the documents one by one to scan. Using the Carrier Sheet allows you to scan documents that can be damaged quite easily such as photographs, or non-standard size documents that are difficult to load directly such as clippings. Using the optional Carrier Sheet or Photo Carrier Sheet allows you to scan documents that can be damaged quite easily such as photographs, or non-standard size documents that are difficult to load directly such as clippings. Using an optional Carrier Sheet allows you to scan documents that can be damaged quite easily such as photographs, or non-standard size documents that are difficult to load directly such as clippings.
ATTENTION
-
The optional Carrier Sheet or Photo Carrier Sheet is only available for Return Scan, in which a document is inserted into the manual feeder and scanned.
For details about documents that can be scanned with the Carrier Sheet or Photo Carrier Sheet, refer to Documents That Can Be Scanned with the ScanSnap in the ScanSnap Help.
Note that multiple Carrier Sheets or Photo Carrier Sheets can be loaded and scanned in one go with the ScanSnap.
The procedure to perform a scan with the Photo Carrier Sheet is described as an example below.
-
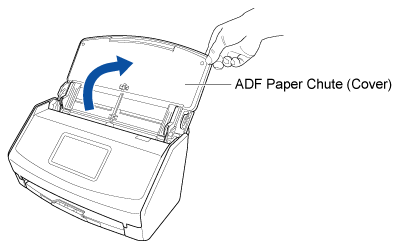
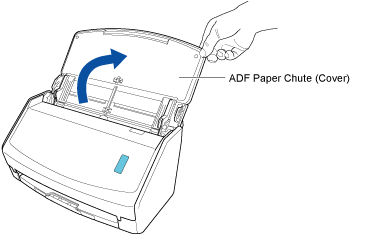
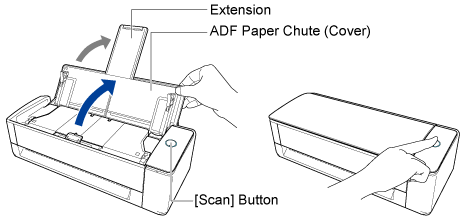
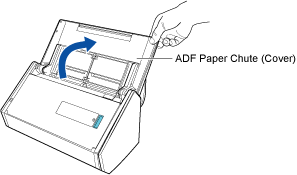
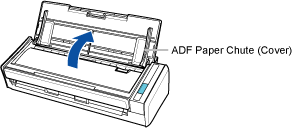
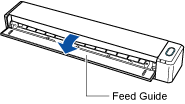
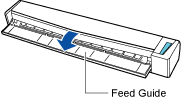
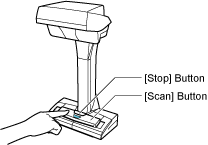
Open the ADF paper chute (cover) of the ScanSnap to turn the power on. Hold the right side of the ADF paper chute (cover) of the ScanSnap then open it or press the [Scan] button to turn it on. Open the feed guide of the ScanSnap to turn the power on. Press the [Scan] button or [Stop] button on the ScanSnap to turn the power on.
Open the ADF paper chute (cover) fully so that the [Scan] button lights up in blue.
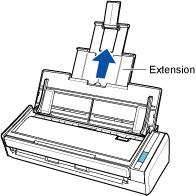
When the ADF paper chute (cover) is opened, the extension will rise automatically.
-
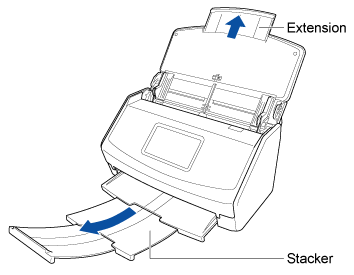
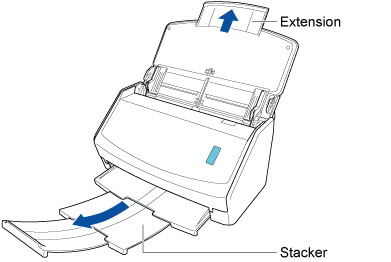
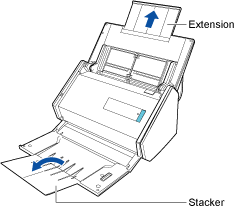
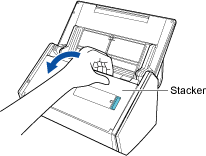
Pull out the extension and the stacker on the ADF paper chute (cover). Pull out the extension on the ADF paper chute (cover) and open the stacker. Pull out the extension.
-
In the Home screen on the touch panel, select a profile from the profile list. Select a profile from the profile list.
You can create a new profile or modify the settings for a profile according to the purpose of scanning documents.
For details, refer to Configuring Conditions for Scanning Documents (Profile).
For details, refer to Configuring Conditions for Scanning Documents (Profile).
For details, refer to Configuring Conditions for Scanning Documents (Profile).
For details, refer to Configuring Conditions for Scanning Documents (Profile).
For details, refer to Configuring Conditions for Scanning Documents (Profile).
For details, refer to Configuring Conditions for Scanning Documents (Profile).
For details, refer to Configuring Conditions for Scanning Documents (Profile).
For details, refer to Configuring Conditions for Scanning Documents (Profile).
For details, refer to Configuring Conditions for Scanning Documents (Profile).
For details, refer to Configuring Conditions for Scanning Documents (Profile).
HINT
When multiple users share one ScanSnap unit, make sure that a profile that was created with another computer is not selected.
You can switch to the profile list which displays only profiles created with the computer that is using the ScanSnap.
For details, refer to Changing Users in order to Display the User's Own Profiles.
-
Specify the feeding method.
-
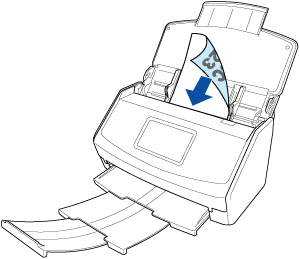
Load only one document in the ADF paper chute (cover).
Load the document face-down and top-first with its back facing you.
-
Press the [Scan] button in the home screen on the touch panel to scan the document.
ATTENTION
-
To continue scanning, load the next document in the ScanSnap after the "Load the next document." message is displayed on the touch panel. If you load the next document while "Scanning" is displayed on the touch panel, scanning starts immediately, which may cause the document to skew during scanning.
If the documents are skewed during scanning, the following problems may occur:
Part of the scanned image appears missing
Slant lines appear in the scanned image
The size of the scanned image differs from the document size
Paper jams occur
HINT
-
You can change the feeding method by pressing the feed mode setting icon in the screen for checking whether to continue a scan.
To scan multiple sheets of documents such as office paper, change the feed mode setting to [Continuous scan].
-
Press the [Finish] button. In the window of ScanSnap Home, where the "Load the next document." message is displayed, click the [Finish Scanning] button. In the window of ScanSnap Home, where the "Load the next document." message is displayed, click the [Finish Scanning] button or press the [Scan] button on the ScanSnap to finish scanning the document.
-
Open the ADF paper chute (cover) of the ScanSnap to turn the power on. Hold the right side of the ADF paper chute (cover) of the ScanSnap then open it or press the [Scan] button to turn it on. Open the feed guide of the ScanSnap to turn the power on. Press the [Scan] button or [Stop] button on the ScanSnap to turn the power on.
Open the ADF paper chute (cover) fully so that the [Scan] button lights up in blue.
When the ADF paper chute (cover) is opened, the extension will rise automatically.
-
Pull the stacker towards you.
-
Pull out the extension and the stacker on the ADF paper chute (cover). Pull out the extension on the ADF paper chute (cover) and open the stacker. Pull out the extension.
-
Configure the settings for a profile.
-
Click the [Scan] button in the Main Window of ScanSnap Home to display the Scan Window.
-
Click
 to display the [Edit profiles] Window.
-
Select a profile for which you want to modify the settings from the profile list.
HINT
-
When creating a new profile, click  .
.
From the template list in the [Add new profile] Window that appears when you click  , select a template profile and modify the settings.
-
Click the [Option] button for [Feed] to display the [Feed option] Window. Click the [Option] button for [Manual Feeder] in [Feed mode setting] to display the [Feed option] Window.
-
Click the [Carrier sheet] button to display the [Carrier Sheet settings] window.
-
Select [two separate images (front and back)] in [Save as] and click the [OK] button.
-
Click the [OK] button to close the [Feed option] window.
-
Click the [Save] button to close the [Edit profiles] window.
-
From the profile list in the scan window, select a profile that you have configured.
-
Load a document in the ScanSnap.
-
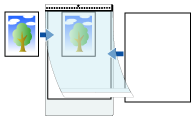
Place the document inside the Carrier Sheet. Place a document inside the Photo Carrier Sheet.
Open the Carrier Sheet and place the top of the document against the top center of the Carrier Sheet.
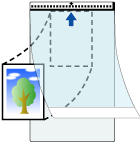
Open the Photo Carrier Sheet and place the top center of the document against the top center of the Photo Carrier Sheet.
-
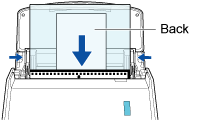
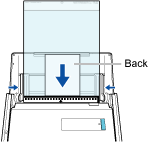
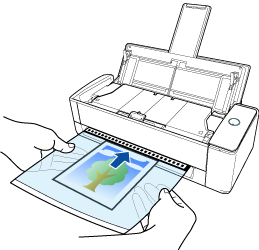
Load the Photo Carrier Sheet with the end which has the black and white pattern as the leading edge in the ADF paper chute (cover) of the ScanSnap. Face the scanning side upwards and insert the part of the Photo Carrier Sheet with the black and white pattern into the manual feeder. Load the Carrier Sheet with the end which has the black and white pattern as the leading edge in the ADF paper chute (cover) of the ScanSnap. Insert the part with the black and white pattern on the Carrier Sheet straight into the feeding section of the ScanSnap, with the scanning side facing up.
Align the side guides with both ends of the Photo Carrier Sheet.
Align the side guides with both ends of the Carrier Sheet.
Make sure that the Photo Carrier Sheet is fed into the ScanSnap and is held firmly.
Make sure that the Carrier Sheet is fed into the ScanSnap and is held firmly.
-
Press the [Scan] button to scan the document. Press the [Scan] button to scan the document. Press the [Scan/Stop] button to start scanning the document.
To continue scanning, insert the next document to be scanned. When the document is inserted, scanning starts automatically.
HINT
To start a scan manually by pressing the [Scan] button when a document is inserted into the manual feeder, clear the [Automatically scan the second and subsequent sheets during a continuous scan] checkbox in the [Manual feeder] tab in the [Feed option] Window when you configure the settings for a profile.
For details, refer to Modifying the Settings for a Profile.
To continue scanning, insert the next document to be scanned. When the document is inserted, scanning starts automatically.
-
In the window of ScanSnap Home, where the "Load the next document." message is displayed, click the [Finish Scanning] button or press the [Scan] button on the ScanSnap to finish scanning the document. Press the [Scan/Stop] button to finish scanning documents.
The image created from the document that you scanned is saved in the folder which is specified for [Save to] in the profile.
HINT
-
In the following cases, place a blank (white) sheet of paper underneath the document when scanning:
-
The scanned image is not saved with the same length and width as those of the document
-
Shadows appear around the edges of the scanned image
-
Black lines appear around the edges of a uniquely shaped cutting document if you place the document in a Photo Carrier Sheet
-
Black lines appear around the edges of a uniquely shaped cutting document if you place the document in the Carrier Sheet
-
When the size of a scanned image to be saved becomes smaller than the size of the original document or a part of the image may appear missing, select [Carrier Sheet size] in [Paper size], and then scan the document.
When [Automatically detects the document type as "Documents", "Business Cards", "Receipts", or "Photos" and scans the document with the appropriate scan settings] is selected for [Document type detection] in the settings for a profile, detecting a document type may fail if the size of an image to be saved is smaller than the size of the document.
If the type of document that you scanned differs from the document type of the content data record displayed in the main window of ScanSnap Home, change the document type of the content data record.
-
You can receive a notification on your computer about the document type for the content data records and the save destination for the scanned images after the scanning of documents is complete.
For details, refer to Specifying Actions of ScanSnap Home.
When you establish a link with a cloud service with ScanSnap Cloud, refer to Specifying Actions When Using ScanSnap Cloud.
For details, refer to Specifying Actions of ScanSnap Home.

