How to Configure Scan Settings
You can configure ScanSnap Manager scan settings in the ScanSnap setup window depending on your intended use of the scanned images.
- Click the ScanSnap Manager icon
 in the Dock while holding down the [control] key on the keyboard, and select [Settings] from the ScanSnap Manager menu.
- The ScanSnap setup window appears.
- Configure the scan settings in each tab.
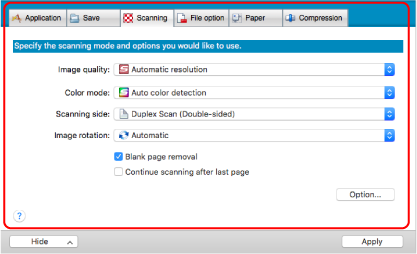
For details about each tab, refer to the ScanSnap Manager Help.
- Click the [Apply] button.
- Scan settings are changed.
- When you use the Quick Menu, scan settings for the [Customize] button are changed.
- When you use a profile, scan settings for the currently selected profile are changed.
HINTIf you press the [Scan] button on the ScanSnap while the ScanSnap setup window is displayed, the ScanSnap setup window closes and scanning starts. Scan settings that you have changed are saved and documents are scanned by these settings.
Note that when other windows are open, these windows are not closed and scanning does not start even if you press the [Scan] button on the ScanSnap.
- Scan settings are changed.
HINT
- When you connect SV600 and another ScanSnap to a computer, you can change the settings for each ScanSnap. For details, refer to When Two ScanSnaps Are Connected to a Computer (SV600).
- You can also open the ScanSnap setup window by pressing the [command
 ] and [S] keys at the same time. This operation is enabled when ScanSnap Manager is active (the ScanSnap Manager menu is displayed in the menu bar).